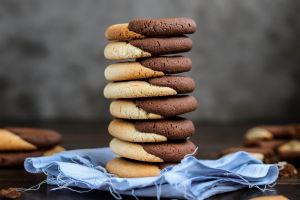
If you've ever thought making bread was too complicated, it's time to rethink! With just four basic ingredients and a few easy-to-follow steps, you can be baking your own delicious bread in no time.
Thanks to Kearin from the Wellington Bakery, we've gathered some simple tips to help you get started. And before you know it, you'll be hooked on the joy of baking fresh bread at home!
What Makes Yeast Work?
First, let's talk about yeast—the secret behind every great loaf of bread. Yeast "feeds" on flour, breaking down the starches into sugars. While yeast doesn't require extra food, adding a little sugar at the beginning can help it activate more quickly.
Yeast also needs moisture. When making bread, it's best to use lukewarm water or milk to help activate the yeast and get it bubbling away. Make sure the liquid isn't too hot, though—anything over 45°C can destroy the yeast. The ideal temperature range for proofing your dough is between 20-25°C, and anything above 30°C could hinder yeast activity. If you're using an oven, keep the temperature low—about 30°C or lower is perfect.
For best results, it's also important to use glass or ceramic bowls to keep the dough warm. While plastic and metal work, they don't retain heat as well. Another trick is to place a warm wheat bag under your bowl to keep things cozy.
The Types of Yeast
You might notice that some recipes call for different types of yeast. No worries—here in New Zealand, all commercial yeast comes from the same strain (sourdough is a different story!). Active dry yeast is a good all-around choice and can be found in most supermarkets. It's typically shaped like little balls. Keep it in the fridge, and make sure it's within its expiration date for the best quality.
Some recipes may ask for fresh yeast, which looks like a moist cake or even modeling clay. Fresh yeast can be used in place of dry yeast, but be sure to adjust the measurements. As a general rule of thumb, for every 500g of flour, you'll need about 1.5 teaspoons of active dry yeast or 15g of fresh yeast. If the recipe calls for more yeast than this, it'll speed up the rising time but may affect the flavor. Remember, more isn't always better!
What About Surebake Yeast?
There's also a type of yeast called Surebake, which you can find in supermarkets. This yeast is mixed with dough enhancers like vitamin C to improve dough texture. If you use Surebake, remember you'll need about double the amount because only half of it is actual yeast.
It's also important to balance the yeast with salt. Too little salt and your bread will taste overly bready or even slightly bitter; too much salt, and the dough won't rise properly. For every 500g of flour, aim for around 10g (or 1.5 teaspoons) of salt.
The Right Flour
When it comes to flour, in New Zealand, bread flour is referred to as high-protein flour. Compared to regular flour, it has a higher gluten content, around 11-12%, whereas all-purpose flour typically has about 9-10%. If you use all-purpose flour, you'll need to knead the dough longer, and your bread may not be as fluffy.
High-protein flour also absorbs more liquid, so it's best to stick with the type of flour your recipe recommends until you feel confident in adjusting the proportions.
What Tools Do You Need?
Good news: you don't need much to get started. You'll need just five things:
• A bowl (preferably ceramic or glass)
• A scale
• A plastic scraper (or your hands!)
• A shower cap or cling film to cover the dough
• A spray bottle
While you can use a stand mixer to save some kneading time, it's easy to overwork the dough, so be careful. Kneading by hand is the best way to get a feel for the dough and improve your technique. Plus, it's a lot of fun—and therapeutic!
What Ingredients Do You Need?
Making bread is surprisingly simple—just four basic ingredients:
• Water or milk
• Flour
• Yeast
• Salt
If you want to get fancy, you can add extras like eggs, butter, sweeteners, or spices, but these are all built on the simple foundation of those four ingredients.
Kneading the Dough
Kneading is the most important step in bread-making. As you knead, the gluten in the flour stretches and strengthens, creating a dough with structure. This helps trap the air bubbles created by the yeast, so your bread rises properly.
When kneading, you want the dough to be firm and smooth, not sticky. It should no longer stick to the counter. This is a good sign that it's ready. If you knead too much, however, the dough can become too tough and lose its shape.
Proofing the Dough
Proofing (or letting the dough rise) is when you let the yeast do its magic. This process usually takes about an hour, during which the dough will double in size. If the dough starts to collapse, it's over-proofed, meaning the gluten structure has broken down.
Even if your dough is slightly over-proofed, it's still fine to bake—it just won't have quite the same texture. Keep a close eye on your dough as it proofs, especially once it's ready for the oven.
Tips for Fluffy Bread
Here are a few pro tips to help you make soft, fluffy bread:
• Don't rush the kneading process—take your time.
• Don't add too much flour while kneading; let it form on its own.
• Ensure the dough is fully proofed before baking—this helps get those perfect air bubbles inside the bread!
Conclusion
So, Lykkers, now you're ready to try making your own bread at home! Whether you stick to the basics or add some fun extras, the joy of fresh, homemade bread is waiting for you. Happy baking, and let us know how it goes!