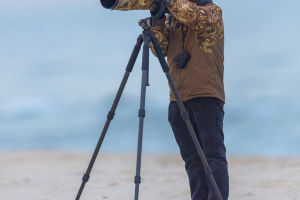
When we think of photography, we often rely on basic rules like the rule of thirds, the golden ratio, and triangular compositions. However, there are other composition techniques we can use to enhance our photos.
These involve utilizing contrasts, geometric shapes, perspective, and even light flaws like vignetting. Today, let's explore these advanced composition rules to help us capture more powerful, visually striking images.
Contrast: The Secret to Dynamic Photos
Contrast is one of the oldest and most effective techniques in photography. It's all about bringing together elements that stand in opposition to each other, whether it's through color, shape, or texture. We can play with contrast in a variety of ways. For example, pairing a smooth, circular shape with a sharp, angular form creates an interesting tension in the frame. Likewise, using contrasting colors like red and green, or yellow and purple, can instantly grab the viewer's attention.
When we combine objects with opposite qualities—such as a bright, shiny object next to a dark, matte one—we create an engaging visual dialogue. In terms of volume, juxtaposing a large object with something tiny, or two objects of the same size but placed in contrasting environments, adds drama to the shot. We can even use contrasting textures, like a rough stone surface next to a smooth, glossy material, to heighten visual interest.
Geometric Shapes: Embrace Balance and Stability
Geometric shapes like triangles, circles, and squares can make our photos feel stable and balanced. These shapes are perfect for creating a sense of harmony and order. Architects and artists have long used geometric forms to structure their work, and photography is no different. A great example can be found in religion art, where shapes like triangles, squares, and circles are often repeated in intricate patterns to create stunning, symmetrical designs.
In urban environments, we can find geometric shapes everywhere—from the straight lines of tall buildings to the grids of windows and the perfect symmetry in architectural elements. By paying attention to these shapes and framing them in our shots, we can bring a sense of order and rational beauty to our photographs. So next time we're walking through the city, look around for these shapes—they're waiting to be captured!
Perspective: Creating Depth in Your Images
One of the most powerful ways to add depth to a photo is through perspective. Perspective lines guide our eyes into the distance, creating a sense of depth and endless space. This technique has been fundamental in classical Western painting, and it works just as well in photography.
To use perspective in our photos, we can look for vanishing points, where parallel lines seem to meet. Whether it's a long road, a railroad track, or even a hallway, these lines help to draw the viewer's attention deeper into the image. Nature offers plenty of great subjects for perspective shots too, like winding rivers, mountain paths, or a series of trees stretching into the distance. These elements create a visual journey, pulling the viewer's gaze from the foreground to the farthest reaches of the image.
Vignetting: Focus the Viewer's Attention
Vignetting is often seen as a flaw in photography, but it can also be a useful tool when used creatively. This occurs when the edges of a photo darken, naturally guiding the viewer's attention to the center of the frame. While traditionally considered a lens defect, in modern photography, vignetting has become a popular stylistic choice, especially among fans of the LOMO style.
By intentionally placing our subject near the center and letting the darkened edges “frame” the subject, we can emphasize the focal point and create a more immersive experience for the viewer. This technique works particularly well in portraits and still life photography, where we want to make sure the subject stands out clearly. So, don't shy away from a little vignette—it can add mood and focus to your photo.
Framing: Using Surrounding Elements
Another great technique is framing. This involves using natural or architectural elements to frame our subject within the photo. Think of using doorways, windows, or even overhanging branches to create a “window” around the subject. This not only highlights the subject but also adds depth and context to the image.
For example, we can ask our model to stand in front of a doorway, letting the frame of the door focus attention on them. This creates a nice separation between the subject and the background, giving the photo a more polished look. It's a simple trick, but it can elevate any photo!
Keep the Integrity of the Scene
When we're shooting portraits, it's often important to avoid cropping out parts of the subject's body, such as their hands or head. Photographers who adhere to traditional methods will argue that showing the subject in full helps maintain the integrity of the shot. This is especially crucial in commercial photography, where the goal is often to showcase a product or person in their entirety.
By ensuring the subject is fully included in the frame, we can avoid any awkward cuts and preserve the composition's natural flow. This is important not only for portrait photography but for any shot where we need to represent the subject accurately.
Bleed: Pushing the Boundaries
The concept of “bleed” in photography refers to cropping part of the subject off so that it extends beyond the edge of the frame. This creates a sense of movement and leaves the viewer curious about what's beyond the photo's borders. This technique is often used in print design, but it can work wonders in photography too.
When we shoot with “bleed,” we leave the subject cut off at the edges—whether it's from the top, bottom, or sides—creating a more dynamic effect. This technique is especially useful when we want to add a sense of mystery or curiosity. It's like inviting the viewer to imagine what's outside the frame, making the photo more engaging.
Vertical and Horizontal Bleed
Vertical bleed is achieved by cropping the top and bottom of the subject, creating a feeling of height and extension. This technique can make objects like trees or buildings appear taller and more imposing. On the other hand, horizontal bleed crops the left and right sides of the subject, giving the impression of width and openness. It can work especially well in wide landscape shots or architectural photography.
When we combine bleed with other composition techniques, we can create a more immersive and dynamic experience for the viewer.
Lykkers, now that we've explored some of the advanced composition techniques, the next time you're out shooting, remember to experiment with contrast, perspective, framing, and even vignetting. These techniques can take your photography to the next level, helping you create more impactful and visually exciting images. Don't be afraid to break out of traditional composition rules—try something new and see what works for you!
Happy shooting!