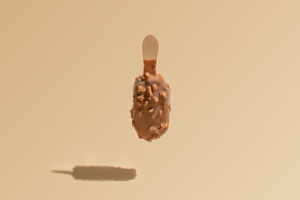
Looking to beat the heat or satisfy a sweet craving, Lykkers?
With endless flavor combinations, mix-ins, and creative touches, making ice cream at home is an adventure in flavor.
Let’s dive into how to create your ultimate frozen dessert with these easy steps!
1. Crafting the Perfect Creamy Base
The base is where the magic begins. Combine two cups of heavy cream and one cup of whole milk for a rich, velvety texture. This base will give your ice cream the perfect scoopability and creaminess. If you prefer a dairy-free version, coconut milk or almond milk can give you a lighter, delightful flavor twist.
2. Add Your Sweetness
Sweetness is essential in ice cream, so add about 3/4 cup of sugar and a pinch of salt to balance the flavors. Gently heat the mixture, stirring until the sugar is completely dissolved. This step is key for a smooth texture that’s free from grainy sugar crystals.
3. Flavor it Up!
Now for the fun part! Enhance your base with flavorings like a teaspoon of vanilla extract for a classic taste or a tablespoon of espresso powder for a coffee kick. Want fruit-flavored ice cream? Stir in some pureed strawberries, mango, or peaches. There are no limits—explore flavors like matcha, chai, or even a touch of lemon zest for a fresh, summery note.
4. Chill and Prep for Freezing
Once your base is flavored, refrigerate it for at least an hour. Chilling before freezing enhances the flavors and speeds up the churning process. After it’s cooled, pour it into your ice cream maker and let it churn until creamy. No ice cream maker? No problem! Pour the mixture into a container, freeze it, and stir every 30 minutes for about 3 hours to prevent ice crystals.
5. Choose Your Mix-Ins
This is where your ice cream gets personal! Stir in your favorite mix-ins like chocolate chips, cookie dough chunks, fresh berries, or caramel swirls. Go for a gourmet twist with a handful of toasted almonds, coconut flakes, or a swirl of peanut butter. Adding mix-ins during the final stages of churning keeps them evenly distributed for a perfect scoop.
6. Final Freeze
Once your ice cream is churned to perfection, transfer it to a freezer-safe container and let it set for another 2-4 hours. This step allows your ice cream to firm up so it’s perfectly scoopable. While the wait might be tough, it’s the secret to that smooth, creamy texture we all love.
7. Scoop, Serve, and Savor
Finally, it’s time to dig in! Scoop your homemade creations into bowls or cones and enjoy the flavors you created. Serve it alongside brownies, pies, or fruit for an extra indulgent treat. Each scoop is a celebration of your creativity, a treat made just the way you like it.
So, if you’re ready to get creative with a classic dessert, grab your ingredients and let your imagination run wild. With homemade ice cream, every scoop is an adventure in flavor!


